Spiral router bits produce cleaner cuts with less tear-out, while straight router bits cost less and handle basic grooves and dadoes perfectly well. That’s the short answer — but choosing between them for your specific project requires understanding exactly how each design interacts with wood grain, manages heat, and affects your finished edges. This 2026 guide breaks down every factor that matters so you can stop guessing and start making the right call.
Spiral vs Straight Router Bits: Key Differences Explained
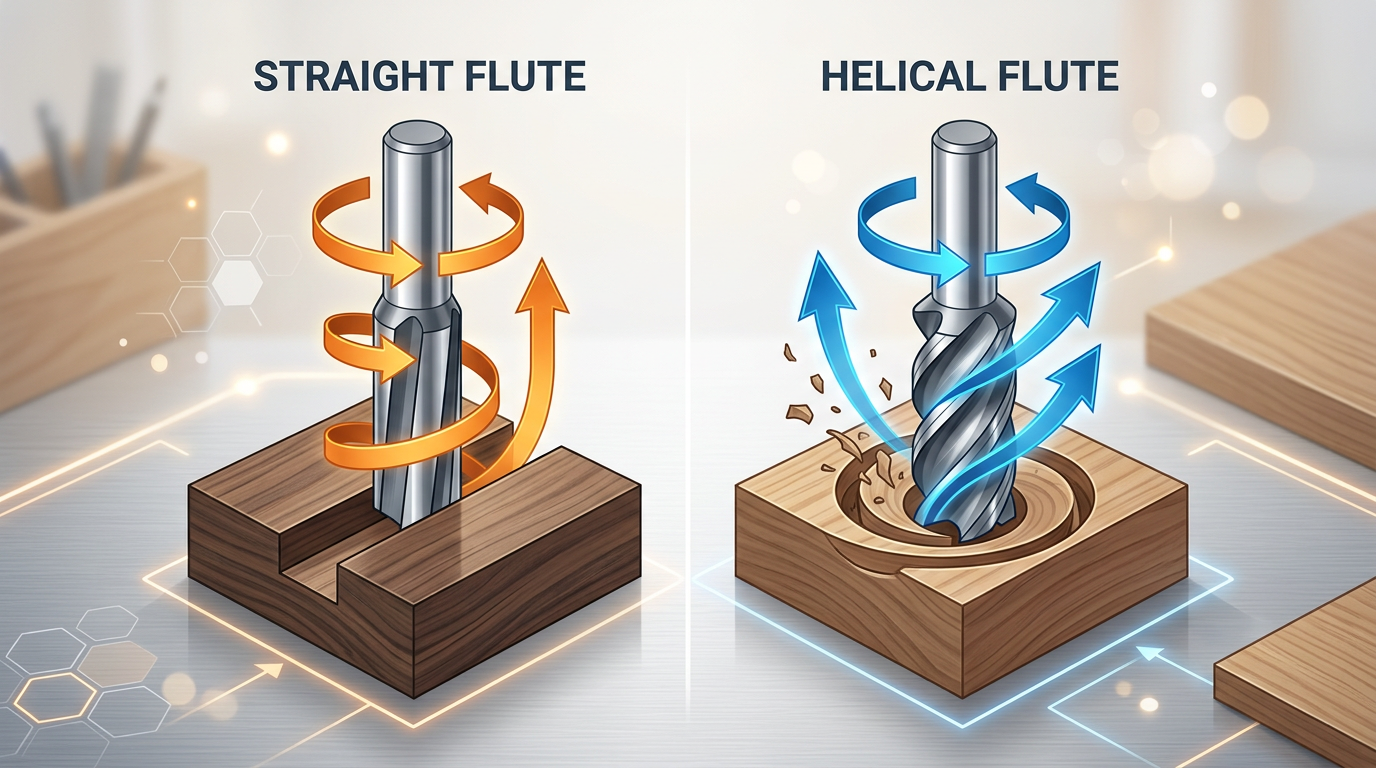
The core distinction comes down to one thing: how the cutting edge meets the wood. A straight router bit has flutes that run parallel to the bit’s axis — picture a flat blade chopping straight down into the material. A spiral router bit wraps its flutes around the shaft in a helix, creating a continuous shearing action as it rotates.
That geometric difference drives everything else: cut quality, chip removal efficiency, heat buildup, noise, and which projects each bit handles best.
Here’s a quick-reference comparison:
| Feature | Straight Router Bit | Spiral Router Bit |
|---|---|---|
| Flute geometry | Parallel to axis (vertical) | Helical wrap around shaft |
| Cutting action | Chopping / intermittent | Shearing / continuous |
| Chip evacuation | Moderate — chips stay in cut | Excellent — chips pulled or pushed out |
| Surface finish | Good on softwoods, fair on hardwoods | Excellent across most species |
| Tear-out risk | Higher, especially cross-grain | Lower with correct spiral direction |
| Typical price (1/2″ carbide) | $8–$20 | $25–$60+ |
| Best for | Dadoes, rabbets, template work | Mortises, CNC, plywood, deep slots |
Most woodworkers don’t need to pick one or the other exclusively. The smarter approach is understanding which situations demand which bit — and that’s what the rest of this guide covers in detail.
How Straight Router Bits Work
A straight router bit is about as simple as cutting tool design gets. Two flat cutting edges (sometimes one or three) run vertically along the bit body. When the router spins, those edges chop into the wood at a perpendicular angle to the surface.
Think of it like a lawnmower blade hitting grass — it’s effective, but the engagement is abrupt. Each flute makes full contact with the material all at once, which creates a pulsing load on the router motor. You can feel this as vibration, especially in harder species like maple or white oak.
Construction materials vary. Budget straight bits use high-speed steel (HSS), which dulls quickly in abrasive materials like MDF and particleboard. Mid-range options feature carbide-tipped edges brazed onto a steel body — these handle most workshop demands. If you want to understand the performance gap between these materials, the complete 2026 guide to woodworking cutting tools covers the HSS vs carbide debate thoroughly.
Straight bits interact with wood grain in a predictable but sometimes problematic way. When routing along the grain, results are usually clean. Cross-grain cuts are where trouble starts — the chopping action can lever up wood fibers before cleanly severing them, leaving fuzzy or torn edges.
None of this means straight bits are bad tools. They’ve been the default router bit for decades because they work. They’re just limited in specific scenarios where the spiral design genuinely outperforms them.
How Spiral Router Bits Work
Spiral router bits borrow their geometry from end mills used in metalworking. The flutes wrap around the bit body at an angle — typically between 25° and 45° — creating a helical cutting edge that engages the wood progressively rather than all at once.
This is the critical difference. Instead of slamming into the material with the full width of the cutting edge simultaneously, a spiral bit’s helix means only a small portion of the edge contacts the wood at any given moment. The result? A smooth, continuous shearing action that slices fibers cleanly rather than tearing them.
Picture the difference between chopping a carrot with a cleaver versus slicing it with a sharp chef’s knife drawn at an angle. Same material, dramatically different cut quality. That analogy captures the spiral vs straight dynamic pretty accurately.
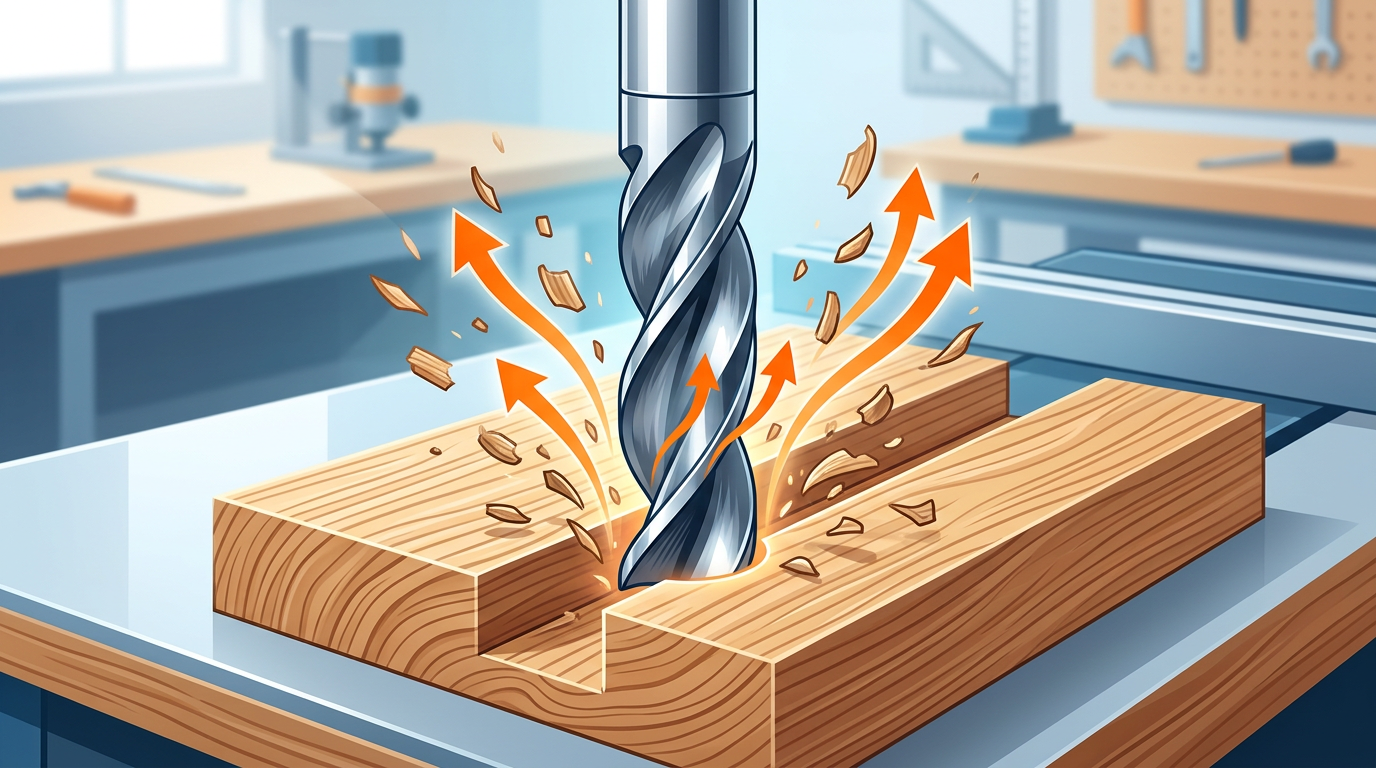
The helical flute design also creates a natural auger effect. Depending on the direction of the helix, chips are either pulled upward out of the cut (upcut spiral) or pushed downward into it (downcut spiral). This built-in chip evacuation mechanism is a massive advantage in deep cuts and CNC operations where chip packing can burn wood and destroy bits.
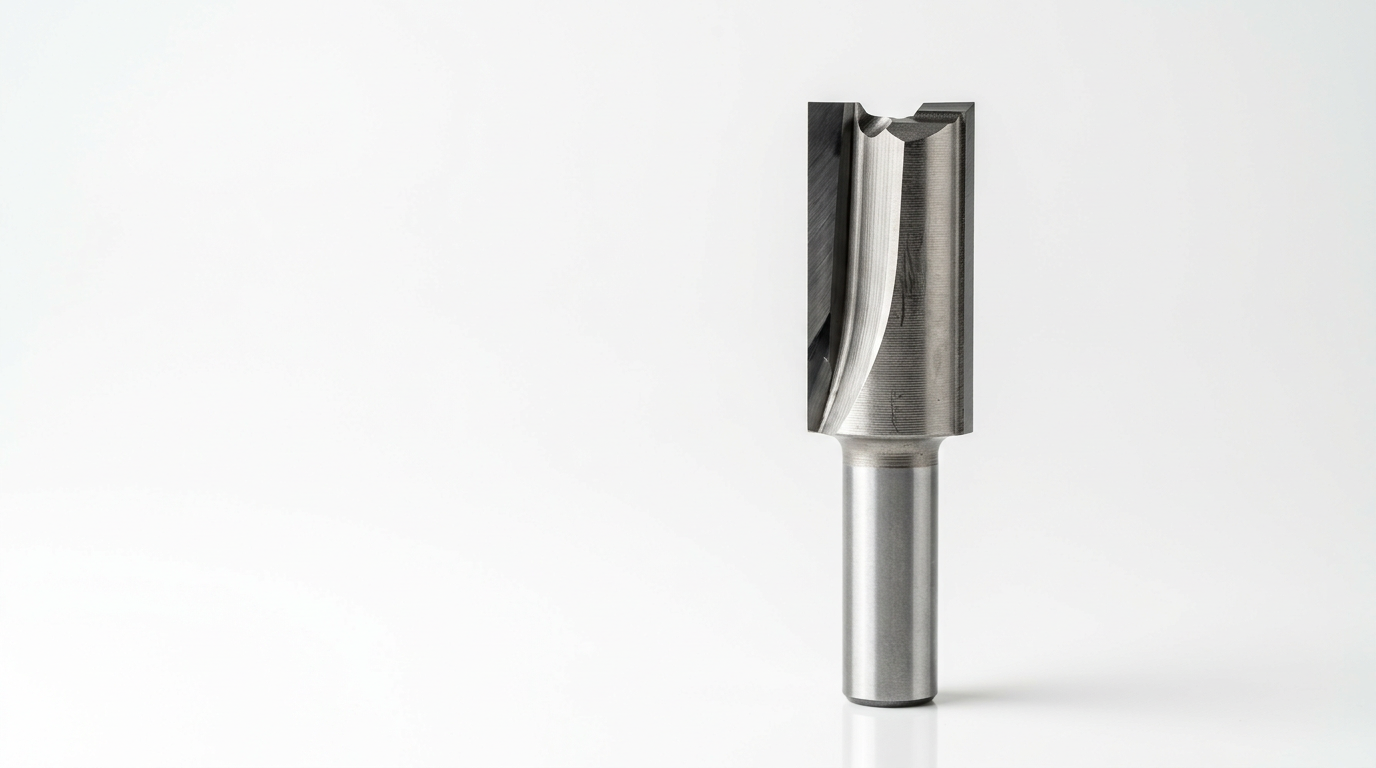
Most spiral bits are solid carbide. The helical geometry is difficult to produce with brazed carbide tips, so manufacturers typically grind the entire bit from a single carbide blank. This makes them harder, more heat-resistant, and capable of holding a sharp edge significantly longer than carbide-tipped straight bits. It also makes them more expensive — and more brittle if you crash them into a clamp or screw.
For anyone running CNC routers in production environments, spiral bits aren’t optional. They’re the standard. The combination of superior chip evacuation, cleaner edges, and longer tool life makes them the only practical choice for automated cutting.
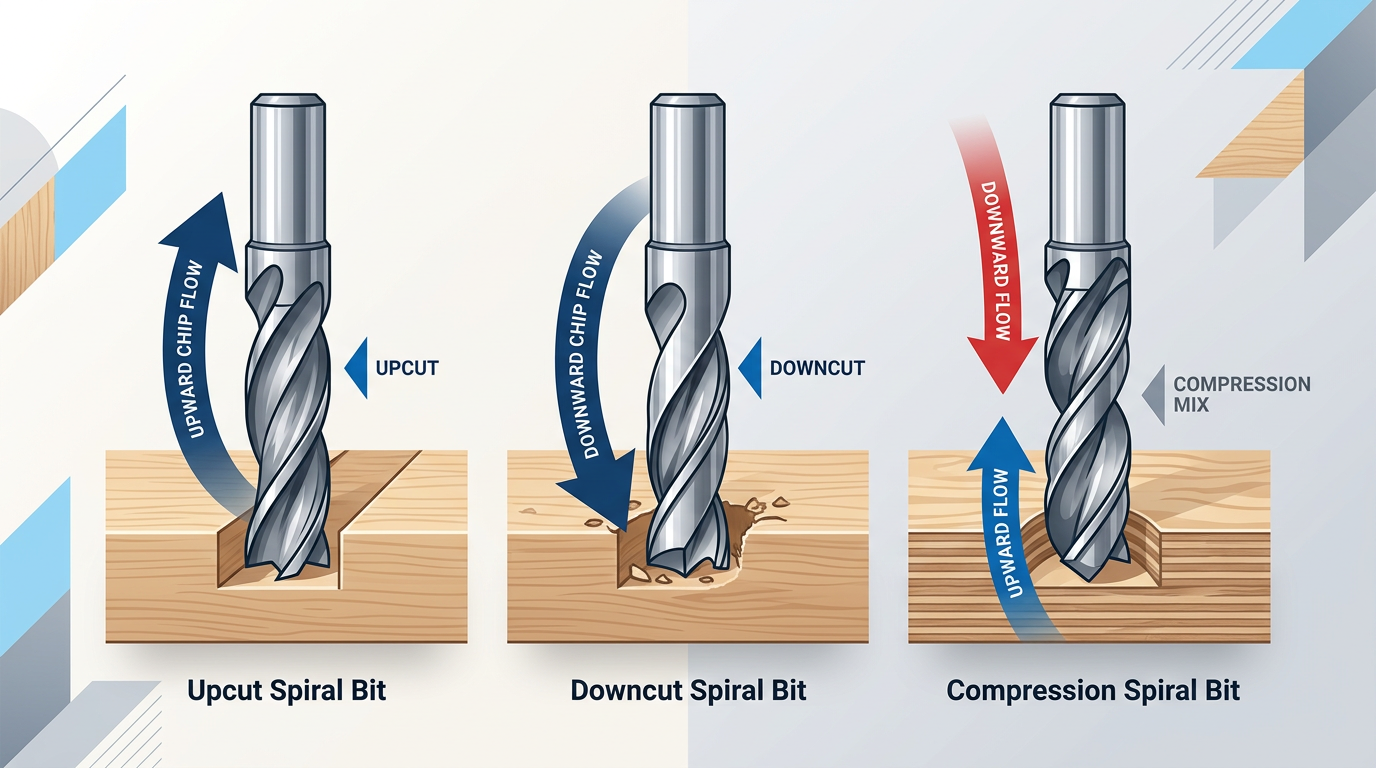
Upcut vs Downcut vs Compression Spiral Bits
Not all spiral bits behave the same way. The direction of the helix determines where chips go and which surface of your workpiece gets the cleanest edge. This is where many woodworkers — even experienced ones — make costly mistakes.
Upcut Spiral Bits
The helix pulls chips upward and out of the cut, like a drill bit. Excellent for chip evacuation in deep grooves, mortises, and through-cuts. The trade-off? The upward pulling force can lift veneer or splinter the top surface of plywood.
Use upcut when: chip clearing matters more than top-surface finish — deep slots, mortises, pocketing operations, and cuts in solid wood where you’ll sand or trim the top edge afterward.
Downcut Spiral Bits
The helix pushes chips downward into the cut. This pressing action holds the top fibers down, producing a beautifully clean top edge. But chips pack into the groove, which generates heat and can burn the wood on deep cuts.
Use downcut when: the top surface is your show face — shallow dados in veneered panels, inlay work, sign carving, and any cut where the top edge must be tear-out-free.
Compression Spiral Bits
The clever hybrid. A compression bit features an upcut geometry on the bottom portion and a downcut geometry on the top. During a full-depth pass, the bottom section pulls chips up while the top section pushes fibers down. Both the top and bottom surfaces of the workpiece get clean edges simultaneously.
Use compression when: cutting through plywood, melamine, or double-sided laminate where both faces are visible. These bits are the go-to for CNC nesting operations in panel processing.
For a deeper dive into how these three types perform in real CNC production, the upcut vs downcut vs compression bits guide covers feed rates, depth strategies, and material-specific recommendations.
Quick rule of thumb: Upcut for chip clearing. Downcut for clean tops. Compression for clean on both sides. Memorize that, and you’ll pick the right spiral bit 90% of the time.
Cut Quality and Surface Finish Comparison
This is where the rubber meets the road for most woodworkers. You can debate geometry and chip flow all day, but what really matters is the finished edge coming off your router.
Straight bits produce acceptable results in many situations. Routing a dado in pine or poplar? A sharp straight bit does fine. Edge-trimming with a bearing-guided flush trim bit? Perfectly adequate. The problems show up when you push straight bits into harder species, cross-grain cuts, or materials with delicate surface layers.
Spiral bits consistently produce smoother surfaces. The shearing action severs wood fibers more cleanly, leaving edges that often need minimal sanding. On a hardwood like cherry or walnut, the difference between a straight-bit edge and a spiral-bit edge is visible to the naked eye — and very obvious to the touch.
Tear-Out Performance by Material
| Material | Straight Bit Result | Spiral Bit Result |
|---|---|---|
| Softwood (pine, cedar) | Clean with sharp bit | Very clean |
| Hardwood (oak, maple) | Minor tear-out common | Clean shear cut |
| Plywood | Top-layer splintering likely | Clean with downcut/compression |
| MDF | Fuzzy edges, dust packing | Cleaner edges, better dust flow |
| Melamine/Laminate | Chipping almost guaranteed | Clean with compression bit |
Here’s something that doesn’t get discussed enough: bit sharpness matters more than bit type for the first 50 feet of cutting. A brand-new straight bit will outperform a dull spiral bit every time. The spiral advantage really shows itself over extended use, because the solid carbide construction holds its edge longer, and the shearing action is inherently less aggressive on the cutting edge itself.
If you’re dealing with persistent tear-out issues across different bit types, the problem might run deeper than bit selection. The CNC tear-out prevention guide covers feed rate optimization, climb vs conventional cutting, and grain direction strategies that apply to both handheld and CNC routing.
Chip Evacuation and Heat Management
Chip evacuation sounds like a minor technical detail until you’ve burned a groove into a $200 piece of walnut. Then it becomes the only thing you care about.
Straight bits have a fundamental limitation: their vertical flutes don’t create any directional force on the chips. Wood waste just sits in the cut, getting re-cut by the spinning flutes. Each re-cut generates friction. Friction generates heat. Heat burns wood and accelerates edge dulling.
In shallow cuts — say, 1/4″ deep or less — this barely matters. The chips escape on their own. But route a 3/4″ deep mortise with a straight bit and you’ll see (and smell) the problem immediately. Smoke, discoloration, and a bit that’s noticeably duller after one pass.
Spiral bits solve this mechanically. The helical flute acts like an Archimedes screw, physically transporting chips either up or down depending on the spiral direction. An upcut spiral in a deep mortise keeps the channel clear continuously, allowing the cutting edge to engage fresh wood on every revolution.
The thermal benefit compounds over time. According to research published by the USDA Forest Products Laboratory, cutting tool temperatures above 400°C begin degrading carbide binder integrity, accelerating wear exponentially. Efficient chip evacuation keeps operating temperatures well below this threshold.
For production shops running hundreds of linear feet per day, this isn’t a marginal improvement — it’s the difference between resharpening every week versus every month.
Best Applications for Straight Router Bits
Straight bits aren’t obsolete. Far from it. There are specific operations where they’re the better choice — or at least the equally good but cheaper choice.
Dadoes and grooves in solid wood. A 3/4″ straight bit plowing a 1/4″-deep dado for a shelf? Perfect application. The cut is shallow enough that chip evacuation isn’t an issue, and the flat bottom of a straight bit creates a cleaner groove floor than most spiral bits.
Rabbets. Whether you’re using a dedicated rabbet bit with a bearing or a standard straight bit with a fence, the straight geometry excels here. Rabbets are typically shallow, single-pass cuts where the straight bit’s simplicity is an asset.
Template and pattern routing. Bearing-guided straight bits are the standard for flush trimming and template work. The vertical cutting edge follows the template cleanly, and the straight geometry makes it easy to see exactly where the bit is cutting relative to the bearing.
Edge trimming. Trimming edge banding, trimming laminate, cleaning up glue lines — straight bits handle these light-duty tasks efficiently. No need to spend $40 on a spiral bit for a job that a $12 straight bit does just as well.
Hinge mortises and shallow recesses. When you’re routing a 1/8″-deep hinge mortise with a template, a straight bit is fast, predictable, and cheap to replace when it dulls.
The pattern here is clear: straight bits shine in shallow cuts, template-guided work, and situations where a flat groove bottom matters. If your typical routing depth stays under 1/2″ and you’re working in solid wood, straight bits handle 70% of common tasks without breaking a sweat.
Best Applications for Spiral Router Bits
Spiral bits earn their premium price in situations where straight bits struggle or fail outright.
Mortise cutting. Deep, narrow mortises are the spiral bit’s signature move. The upcut helix clears chips continuously, preventing the heat buildup and burning that plague straight bits in deep plunge cuts. A 1/4″ upcut spiral in a 1.5″-deep mortise produces clean walls with zero char — try that with a straight bit and you’ll be sanding burn marks for twenty minutes.
CNC routing operations. This isn’t even a debate in production environments. CNC machines run unattended at high feed rates, and chip packing can cause catastrophic failures — broken bits, burned panels, scrapped parts. Spiral bits are mandatory for serious CNC work. The top CNC router bit types for woodworking factories breaks down which spiral configurations work best for different panel materials.
Plywood and veneered panel cutting. Downcut spirals keep the top veneer intact. Compression bits protect both faces. If you’re building cabinets from pre-finished plywood, a compression spiral bit eliminates the need for edge sanding or taping before cuts.
Slotting and deep grooving. Any groove deeper than 1/2″ benefits from spiral chip evacuation. The deeper the cut, the bigger the advantage.
Plunge cutting. Spiral bits plunge into material smoothly thanks to their center-cutting design and gradual engagement. Straight bits can plunge too, but the abrupt full-width engagement makes it rougher and riskier, especially freehand.
Hardwood joinery. Dovetails, box joints, and decorative grooves in cherry, walnut, or hard maple all benefit from the cleaner shearing action. The reduced tear-out means less sanding and sharper joint lines.
Durability, Lifespan, and Cost Comparison
Price is the first thing most people compare. It’s also the most misleading metric if you look at it in isolation.
A decent 1/2″ carbide-tipped straight bit runs $8 to $20 depending on brand and shank size. A comparable solid carbide spiral bit costs $25 to $60. Some premium spiral bits from European manufacturers hit $80+. That’s a 3x to 5x price difference at the register.
But here’s what changes the math: solid carbide spiral bits typically last 3 to 5 times longer than carbide-tipped straight bits in the same material. The solid carbide construction resists abrasion better, and the shearing cut puts less stress on the cutting edge per revolution. In abrasive materials like MDF and particleboard, the lifespan gap widens even further.
Cost-Per-Foot Analysis
| Bit Type | Typical Cost | Approx. Linear Feet Before Resharpening | Cost Per Foot |
|---|---|---|---|
| Carbide-tipped straight (1/2″) | $15 | 300–500 ft in hardwood | ~$0.03–0.05 |
| Solid carbide spiral (1/2″) | $45 | 1,000–2,000 ft in hardwood | ~$0.02–0.04 |
On a cost-per-foot basis, the spiral bit is often cheaper despite the higher upfront price. For hobbyists who route a few joints per month, the difference is negligible — buy whichever fits the task. For production shops cutting hundreds of feet daily, the spiral bit’s longevity delivers real savings.
One durability caveat: solid carbide is harder but more brittle than carbide-tipped steel. Drop a solid carbide spiral bit on a concrete shop floor and there’s a real chance you’ll chip the cutting edge. Carbide-tipped straight bits survive impacts better because the steel body absorbs shock. Handle your spiral bits with care.
The material science behind this is worth understanding if you’re making purchasing decisions for a shop. The complete woodworking cutting tools guide covers carbide grades, cobalt binder percentages, and how grain size affects edge retention across different tool types.
Noise and Vibration Differences
This factor rarely appears in router bit comparison articles, but anyone who’s spent eight hours at a router table notices it immediately.
Straight bits are louder. The intermittent chopping action — where the full cutting edge engages and disengages the material in rapid pulses — creates a harsh, staccato noise profile. It also transmits more vibration through the router and into your hands. Over a long session, that vibration contributes to fatigue.
Spiral bits run noticeably smoother. The gradual, continuous engagement of the helical edge means the cutting load stays more constant throughout each revolution. Less load variation equals less vibration, less noise, and a more pleasant routing experience.
Is this a reason to choose spiral over straight? By itself, probably not. But combined with the cut quality and chip evacuation advantages, it’s another data point that tips the balance for extended use.
One thing worth mentioning: a dull bit of either type is louder and rougher than a sharp bit of the other type. If your router suddenly sounds angrier than usual, check the cutting edge before blaming the bit geometry. A dull straight bit vibrates more than a sharp straight bit by a significant margin.
Which Router Bit Should You Choose? Decision Guide
Forget the blanket recommendations. The right bit depends on exactly four variables: your material, your cut depth, your desired finish, and your equipment.
Choose a Straight Bit When:
- You’re cutting dadoes, rabbets, or grooves shallower than 1/2″ in solid wood
- You’re doing template or pattern routing with a bearing guide
- Budget is tight and you need a functional bit for basic joinery
- You’re edge-trimming laminate or banding
- The groove bottom flatness matters more than sidewall finish
Choose a Spiral Bit When:
- You’re cutting deeper than 1/2″ — mortises, deep slots, through-cuts
- You’re working with plywood, melamine, or veneered panels
- Surface finish quality is critical and you want to minimize sanding
- You’re running a CNC router (spiral is essentially mandatory)
- You’re plunge-cutting without a pre-drilled starter hole
- You’re routing hardwoods where tear-out is a persistent problem
Which Spiral Type?
- Upcut: Deep mortises, pocketing, through-cuts in solid wood where the top edge will be hidden or trimmed
- Downcut: Shallow grooves in veneered surfaces, inlay routing, sign carving — anywhere the top face is your show surface
- Compression: Through-cuts in plywood and double-sided laminates where both faces must be clean
Handheld Router vs CNC
If you’re using a handheld router for general woodworking, a mix of straight and spiral bits makes sense. Start with a set of straight bits for everyday tasks, then add spiral bits as specific projects demand them.
If you’re running a CNC machine, invest primarily in spiral bits. The efficiency gains, tool life, and cut quality justify the cost at production volumes. Straight bits have almost no role in CNC woodworking beyond very specific edge operations.
Frequently Asked Questions
Can I use a spiral bit in a handheld router?
Yes, absolutely. Spiral bits work in any router that accepts their shank size (typically 1/4″ or 1/2″). No special adapter or modification needed. The only consideration is feed rate — because spiral bits cut more aggressively due to their shearing action, you may need to slow your hand feed slightly compared to a straight bit, especially in hardwoods. A router with at least 1.5 HP handles most spiral bits comfortably. Underpowered laminate trimmers can struggle with larger-diameter spirals.
Are spiral router bits worth the extra cost?
For hobbyists doing occasional projects in softwood, the extra cost is hard to justify. A $12 straight bit does the job. But if you’re working regularly in hardwoods, cutting plywood, or doing any production work, spiral bits pay for themselves through longer edge life, less sanding time, and fewer ruined workpieces from tear-out. The break-even point for most shops is surprisingly low — if you route more than 100 linear feet per month, the cost-per-foot math favors spiral bits.
Which bit is better for plywood and veneered surfaces?
A downcut spiral for grooves and dadoes where only the top surface is visible. A compression spiral for through-cuts where both faces matter. Straight bits are the worst choice for plywood — the chopping action almost always chips the veneer layer on at least one side. This is one scenario where the bit type makes a dramatic, immediately visible difference. If you’re building cabinets from pre-finished plywood, a compression bit eliminates the need for pre-scoring or taping your cut lines.
Do straight bits work for plunge cutting?
Some straight bits are designed for plunge cutting — look for a center-cutting design where the flutes extend to the center of the bit’s bottom face. Standard straight bits without center-cutting geometry should not be plunged into material; they’ll burn, deflect, and potentially break. Even center-cutting straight bits don’t plunge as smoothly as spiral bits, because the full cutting edge engages the material simultaneously rather than gradually. For occasional plunge cuts, a center-cutting straight bit works. For frequent plunge operations, use a spiral.
What should a beginner buy first?
Start with a basic set of straight bits: 1/4″, 3/8″, and 1/2″ widths with 1/2″ shanks. Add a 1/4″ upcut spiral and a 1/4″ downcut spiral once you encounter projects that need them. This five-bit collection covers roughly 80% of common routing tasks without a huge upfront investment.
Do spiral bits require different RPM settings?
Same RPM guidelines apply to both types based on bit diameter — larger diameter means lower RPM. The key difference is feed rate. Spiral bits can often handle slightly faster feed rates because their continuous shearing action distributes cutting forces more evenly. But don’t push it. Let the bit cut at its own pace and listen to the motor. If the router bogs down, slow your feed regardless of bit type.
Final Verdict: Spiral vs Straight Router Bits in 2026
There’s no universal winner. Anyone telling you to only buy spiral bits or only buy straight bits is oversimplifying a nuanced decision.
Straight bits remain the practical, cost-effective choice for shallow grooves, template work, edge trimming, and basic joinery in solid wood. They’re affordable, widely available, and perfectly adequate for a huge range of everyday routing tasks.
Spiral bits are the superior tool when cut quality, chip evacuation, and tool longevity matter — deep cuts, hardwoods, plywood, CNC operations, and any scenario wheretear-out costs you time or materials. The higher price tag is justified by measurable performance advantages that compound over hundreds of cuts.
The smart approach for 2026: Build your collection strategically. Keep a full set of straight bits for daily tasks. Add spiral bits selectively — start with a 1/4″ upcut for mortises, a 1/4″ downcut for veneered surfaces, and a 1/2″ compression bit if you cut plywood regularly. That combination handles 95% of what any woodworking shop encounters.
If you’re running a CNC operation, skip the straight bits entirely for cutting operations and invest in quality solid carbide spirals from the start. The CNC router bit selection guide can help you match specific spiral configurations to your materials and production requirements.
One final thought that most guides skip: a sharp bit of the wrong type outperforms a dull bit of the right type, every single time. Whatever you buy, maintain it. Clean resin buildup after every session. Send bits for professional resharpening before they’re completely shot. A $15 resharpening extends a $45 spiral bit’s life by another 1,000+ feet — that’s the best ROI in your entire tool budget.
Ready to upgrade your routing results? Explore ZC-TOOLS’ full range of precision woodworking cutting tools — engineered for workshops and factories that refuse to compromise on cut quality.