A hinge boring bit, also known as a cup bit or door bit, is a specialized cutting tool designed to drill flat-bottomed blind holes in wood. It has a distinctive shape, with a central point to prevent the bit from wandering and sharp cutting edges on the sides.
This bit is most commonly used for installing European-style concealed hinges on cabinet doors, as it can accurately cut clean, flat-bottomed holes, typically 35 millimeters in diameter, without piercing through the door. Its design also allows for efficient chip removal, making it an essential tool in furniture manufacturing and woodworking DIY projects.

Hinge Boring Bit for Woodworking
What Is a Hinge Boring Bit?
Simply put, a hinge boring bit, also called a cup bit or door bit, is a tool specially designed to drill flat-bottomed round holes in wood.
Its most common use is for installing European-style concealed hinges on cabinet doors.
Key Features
- Flat-Bottomed Cut: Unlike regular drill bits that create a pointed hole, it drills a hole with a very flat bottom, allowing the hinge cup to sit flush against the wood.
- Centering Point: The bit has a small point at the center to prevent it from wandering while drilling, ensuring precise placement.
- Fixed Sizes: The most commonly used standard diameters are 35mm for standard cabinet door hinges and 26mm for smaller hinges.

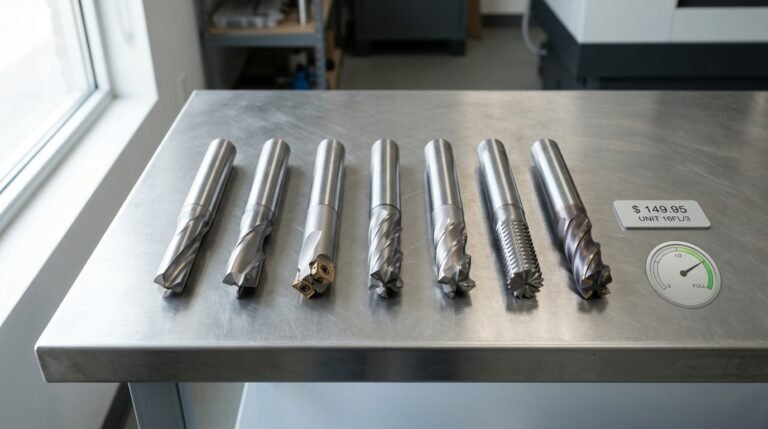
Hinge Drill Bit – For Precision Woodworking on Hinge Boring Machines
What Is a Hinge Boring Bit Used For?
The hinge boring bit has a distinctive shape, and its main function is to carve a cylindrical shallow hole in a wooden board, with the bottom perfectly flat like a mirror. When installing cabinets or wardrobes, the concealed hinges hidden behind the doors require the round metal base to fit into the door panel. A
regular drill bit creates a pointed-bottom hole, which makes installation impossible. Only a flat-bottomed hole drilled with this bit allows the hinge to sit securely while ensuring the door panel is not pierced.
Installing Concealed Hinges
Its primary purpose is to drill the large, circular recesses required for “European-style” or concealed hinges. These hinges have a circular “cup” that must be flush-mounted into the back of a cabinet door.
Creating Flat-Bottomed Blind Holes
Unlike standard drill bits that leave a tapered point, a hinge bit creates a perfectly flat bottom. This allows for maximum depth to secure the hardware without drilling all the way through the face of the door.
Precise Positioning and Clean Cutting
The bit features a sharp center spur (point) that prevents walking, ensuring the hole is exactly where you marked it. The outer spurs shear the wood fibers first, resulting in clean, tear-free edges.
Handling Engineered Wood
Most hinge bits are tipped with Tungsten Carbide (TCT), making them durable enough to cut through abrasive materials like MDF, particleboard, and plywood, which would quickly dull a standard high-speed steel bit.
Decorative and Utility Woodworking
Beyond hinges, these bits are used in various DIY projects to create shallow pockets for embedding magnets, coins, tea light candles, or circular hardware inserts.
Pro Tip: While these can be used with a handheld drill, using a drill press or a hinge jig is highly recommended to ensure the hole is perfectly vertical and the depth is consistent across all doors.
How to Use a Hinge Boring Bit?
When using a hinge boring bit, precision and depth control are the keys to success. Since you are usually drilling into expensive cabinet doors, you have to be extra careful not to drill all the way through the front of the panel.
1. Preparation and Marking
Determine the offset: For a 35mm hinge cup, the center of the hole is usually about 22.5mm from the edge of the door, leaving a margin of roughly 3–5mm. Always check the hinge manufacturer’s instructions, as different brands may have slightly different requirements.
Precise positioning: Use a pencil and measuring tape to mark the center point, then make a small indentation with a center punch or awl. This prevents the center spur of the hinge boring bit from wandering when you start drilling.
2. Securing the Workpiece
Never hold by hand: Do not attempt to hold the door with one hand while operating the drill with the other. Use F-clamps or G-clamps to secure the door firmly to your workbench.
Protective backing: Place a scrap piece of wood under the door. Even though hinge holes are blind holes and won’t go all the way through, the backing provides extra stability.
3. Setting the Drill Depth
Depth control: Standard European hinge cups are typically 12–13mm deep.
Use a depth stop: If your hinge boring bit has a depth stop, adjust it in advance. If you’re using a drill press, set the spindle travel limit.
Tape method: If using a handheld drill without a depth stop, wrap a piece of colored tape around the bit as a visual depth marker.
4. Drilling Operation
Speed control:
-
Carbide-tipped (TCT) bits: Can run at slightly higher speeds.
-
High-speed steel (HSS) bits: Reduce speed on hardwood to prevent heat buildup and burning the wood.
Vertical entry: Keep the bit perpendicular (90°) to the door surface. Using a drill press or a hinge boring jig is recommended.
Drill incrementally: Drill a few millimeters, then lift the bit to clear chips and check depth before continuing. This helps with cooling and prevents chip buildup from affecting the flatness of the hole.
5. Cleaning and Fitting
Clean the hole: After drilling, use a blower or brush to remove fine wood chips, ensuring the bottom is perfectly flat.
Test fit: Insert the hinge cup into the hole. It should fit snugly without wobbling, with the flange flush against the door surface.
Types of Hinge Boring Bits
When choosing hinge boring bits, the main consideration is whether you’re doing occasional DIY work or professional installation. The common types on the market can generally be divided into a few categories:
The all-steel high-speed drill bits are the cheapest. They feel light in hand and are suitable for softwoods like pine or fir, but they quickly become dull when used on particleboard or hardwood. For professionals who use them frequently, alloy-tipped bits are usually preferred. These bits have two carbide tips welded onto the cutting edges. Although slightly more expensive, they are harder, heat-resistant, and can drill through tough, brittle melamine boards without chipping.
Structurally, some bits come with a circular depth stop, which helps control drilling depth and prevents accidentally piercing the door panel—very friendly for beginners. There is also a type designed for use with multi-boring machines. These usually have a flat shank or a screw for secure positioning, and are mainly used in factory production lines with specialized drilling machines.
1. Tungsten Carbide Tipped Bits (TCT Hinge Bits)
This is the most popular type for modern cabinetry, featuring cutting edges made of ultra-hard tungsten carbide.
-
Characteristics: Extremely durable and heat-resistant.
-
Uses: Ideal for man-made materials like MDF, particleboard, and plywood. These materials contain glues that would quickly dull a standard steel bit.
2. High-Speed Steel Bits (HSS Hinge Bits)
These bits are machined from a single piece of high-speed steel.
-
Characteristics: They can be sharpened to a finer, keener edge than carbide, but they dull faster when hitting abrasive glues.
-
Uses: Best for natural solid hardwoods and softwoods. They produce the cleanest, smoothest finish on natural grain.
3. Self-Centering Bits (Vix Bits)
Technically a companion to the boring bit, these feature a spring-loaded guide sleeve.
-
Characteristics: The tapered nose fits perfectly into the screw holes of a hinge, ensuring the drill stays perfectly centered.
-
Uses: Not for the large “cup” hole, but for drilling the pilot holes for the mounting screws to ensure the hinge is perfectly aligned.
4. Machine Boring Bits (Industrial Bits)
Designed for use in professional boring machines, drill banks, or CNC routers.
-
Characteristics: They often have a flat-sided shank for secure gripping and come in Left-Hand (Red) and Right-Hand (Black) rotations for multi-spindle machines.
-
Uses: High-volume industrial furniture production.
5. Adjustable Boring Bits
These bits feature a movable cutting blade that can be set to different diameters.
-
Characteristics: Versatile but generally less stable and precise than fixed-diameter bits.
-
Uses: Useful for DIYers who occasionally encounter non-standard hinge sizes and don’t want to buy multiple individual bits.
| Bit Type | Core Material/Design | Key Characteristics | Best Application |
| TCT Bits | Tungsten Carbide Tipped | Extremely durable & heat-resistant | Man-made boards (MDF, Particleboard) |
| HSS Bits | High-Speed Steel | Razor-sharp edges, smooth finish | Natural solid woods (Hardwood/Softwood) |
| Vix Bits | Spring-loaded sleeve | Automatically centers the drill | Pilot holes for hinge mounting screws |
| Machine Bits | Industrial shank / Color-coded | High efficiency, L/R rotation options | Mass production via CNC or Boring Machines |
| Adjustable Bits | Movable cutting blade | Versatile, fits various diameters | Non-standard sizes or occasional DIY use |
How Does a Hinge Boring Bit Work?
The hinge boring bit is able to drill perfectly flat-bottomed holes thanks to its well-designed structure.
During use, the small point at the center of the bit first pierces the wood to secure its position, ensuring the bit does not wander on smooth surfaces. Next, the two knife-like side edges on the outer ring score a circular groove on the wood surface, cutting through the wood fibers to create clean, chip-free edges.
Finally, the two flat horizontal cutting blades in the middle act like shovels, removing the wood chips layer by layer from the circle. Because these blades are flat, the bottom of the hole is gradually leveled as the bit drills downward, resulting in a hole with a perfectly flat bottom.
1. Centering and Stability
The bit features a sharp Center Spur (the point at the very middle).
-
How it works: As you begin drilling, this point pierces the wood first. It acts as an anchor, much like the center of a compass, preventing the bit from “walking” or drifting across the surface during high-speed rotation.
2. Perimeter Scribing
There are raised Cutting Spurs (or rims) located on the outer edge of the bit.
-
How it works: Before the main blades touch the wood, these outer spurs slice the wood fibers around the perimeter.
-
The Purpose: By pre-cutting the circle, it prevents the wood from splintering or tearing (known as “tear-out”) when the bulk of the material is removed, resulting in a crisp, razor-sharp edge.
3. Flat-Bottom Shaving
The Main Lifters (horizontal cutting blades) are located between the center spur and the outer rim.
-
How it works: Once the perimeter is defined, these blades act like a chisel or a plane, shaving away the wood inside the circle in thin layers.
-
The Purpose: Because these blades are perfectly horizontal, they create a flat bottom. This is essential for concealed hinges, as it allows the hinge cup to sit perfectly flush and stable against the base of the hole.
What are Hinge Boring Bit Drill Used for?
The hinge boring bit is a tool specifically designed for installing concealed furniture hinges. These hinges are also commonly referred to as European-style hinges. The bit’s purpose is to drill a shallow, round hole on the back of a door panel, allowing the cup-shaped base of the hinge to sit flush inside the wood.
1. Creating the Perfect “Cup Hole”
This is its primary job. European hinges have a circular, cup-shaped metal base that must be recessed into the door. This bit drills a hole with a perfectly flat bottom and a precise diameter (usually 35mm or 26mm). Since standard drill bits leave a pointed cone shape at the bottom, they won’t work; only this bit allows the hinge cup to sit flush against the wood.
2. Protecting the Door from Blow-through
Most cabinet doors are about 18mm thick, and the hinge cup requires a depth of around 12mm. These bits feature a very short center spur compared to standard bits. This design ensures you can drill deep enough to seat the hinge without the tip poking through the finished front face of the door.
3. Handling “Tricky” Materials
Modern furniture is often made of particle board, MDF, or laminated materials that chip easily. The outer spurs of this bit score the surface of the wood before the main blades remove the waste. This prevents the laminate from cracking or tearing, leaving you with a clean, professional edge.
4. High-Efficiency Batch Work
In professional shops or DIY projects, these bits are often used with a “hinge jig.” By using the bit’s design to maintain stability, you can quickly and accurately drill dozens of identical holes across multiple cabinet doors with high consistency.
In short: If you are installing hidden hinges on kitchen cabinets or wardrobes, this is the only professional tool for the job.
Hinge Boring Bit vs Forstner Bit: What’s the Difference?
Although these two types of bits may look like twins and are often called interchangeably, they actually serve different purposes.
The Forstner bit is more of an all-rounder in woodworking. Its outer edge usually features a complete circular cutting rim, like a ring of small teeth. This makes it very stable when drilling, producing extremely smooth hole walls. Even when drilling a partial hole near the edge of the wood or at an angle, it rarely wanders.
The hinge boring bit, on the other hand, is specifically designed for installing hinges. To improve efficiency in factories or on job sites, its outer rim is simplified into just two prominent side edges. While this sacrifices a bit of drilling stability, it greatly reduces friction between the bit and the wood, allows faster heat dissipation, prevents burning the wood, and provides more space for chip removal.
| Feature | Hinge Boring Bit | Forstner Bit |
| Center Point | Very short/stubby (Prevents piercing the front of thin cabinet doors) | Longer/sharper (Provides superior tracking and initial stability) |
| Blade Material | Usually Tungsten Carbide (TCT) | Usually High-Speed Steel (HSS) |
| Rim Design | Simplified wings/spurs | Full circular rim (sometimes serrated/toothed) |
| Best Surface | Man-made boards (MDF, Particleboard, Melamine) | Natural solid woods (Hardwood and Softwood) |
| Hole Depth | Optimized for shallow holes (hinge cup depth) | Excellent for deep holes, angled holes, or overlapping holes |
| Size Range | Limited to standard hinge sizes (35mm / 26mm) | Extremely wide range of sizes (6mm to 50mm+) |
| Primary Use | Installing concealed “European” hinges | Fine woodworking, joinery, and decorative boring |
Common Sizes of Hinge Boring Bits
The size of a hinge boring bit is determined by the diameter of the hinge cup, so the specifications are quite standardized.
The most common size is 35mm. Since the vast majority of cabinet and wardrobe doors use standard large hinges, this bit is a staple in any woodworking toolbox.
For smaller projects like jewelry boxes, small cabinets, or thinner doors, a 26mm bit is typically used, as these smaller hinges are more common for lightweight furniture.
Beyond these two main sizes, you might occasionally see 15mm, 20mm, 25mm, or 40mm bits for specific hardware or specialized connectors. However, for most home renovations and DIY tasks, having a 35mm and a 26mm bit will cover almost everything you need.
Hinge Boring Bit Sizes You Can Find from ZC Tools
| Product Code |
Blade Size |
Direction |
Notes |
|---|---|---|---|
| B02004001 | Standard Gang Drill – 12×70L (Two-Piece) | L | ★ |
| B02004002 | Standard Gang Drill – 12×70R (Two-Piece) | R | ★ |
| B02004003 | Standard Gang Drill – 15×70L(Two-Piece) | L | ★ |
| B02004004 | Standard Gang Drill – 15×70R (Two-Piece) | R | ★ |
| B02004005 | Standard Gang Drill – 16×70L (Two-Piece) | L | ★ |
| B02004006 | Standard Gang Drill – 16×70R (Two-Piece) | R | ★ |
| B02004007 | Standard Gang Drill – 17×70L (Two-Piece) | L | ★ |
| B02004008 | Standard Gang Drill – 17×70R (Two-Piece) | R | ★ |
| B02004009 | Standard Gang Drill – 18×70L (Two-Piece) | L | ★ |
| B02004010 | Standard Gang Drill – 18×70R (Two-Piece) | R | ★ |
| B02004011 | Standard Gang Drill – 19×70L (Two-Piece) | L | ★ |
| B02004012 | Standard Gang Drill – 19×70R (Two-Piece) | R | ★ |
| B02004013 | Standard Gang Drill – 20×70L (Two-Piece) | L | ★ |
| B02004014 | Standard Gang Drill – 20×70R (Two-Piece) | R | ★ |
| B02004015 | Standard Gang Drill – 22×70L (Two-Piece) | L | ★ |
| B02004016 | Standard Gang Drill – 22×70R (Two-Piece) | R | ★ |
| B02004017 | Standard Gang Drill – 25×70L (Two-Piece) | L | ★ |
| B02004018 | Standard Gang Drill – 25×70R (Two-Piece) | R | ★ |
| B02004019 | Standard Gang Drill – 26×70L (Two-Piece) | L | ★ |
| B02004020 | Standard Gang Drill – 26×70R (Two-Piece) | R | ★ |
| B02004021 | Standard Gang Drill – 27×70L (Two-Piece) | L | ★ |
| B02004022 | Standard Gang Drill – 27×70R (Two-Piece) | R | ★ |
| B02004023 | Standard Gang Drill – 30×70L (Two-Piece) | L | ★ |
| B02004024 | Standard Gang Drill – 30×70R (Two-Piece) | R | ★ |
| B02004025 | Standard Gang Drill – 32×70L (Two-Piece) | L | ★ |
| B02004026 | Standard Gang Drill – 32×70R (Two-Piece) | R | ★ |
| B02004027 | Standard Gang Drill – 35×70L (Two-Piece) | L | ★ |
| B02004028 | Standard Gang Drill – 35×70R (Two-Piece) | R | ★ |
| B02004029 | Standard Gang Drill – 36×70L (Two-Piece) | L | ★ |
| B02004030 | Standard Gang Drill – 36×70R (Two-Piece) | R | ★ |
| B02004031 | Standard Gang Drill – 37×70L (Two-Piece) | L | ★ |
| B02004032 | Standard Gang Drill – 37×70R (Two-Piece) | R | ★ |
| B02004033 | Standard Gang Drill – 38×70L (Two-Piece) | L | ★ |
| B02004034 | Standard Gang Drill – 38×70R (Two-Piece) | R | ★ |
| B02004035 | Standard Gang Drill – 40×70L (Two-Piece) | L | ★ |
| B02004036 | Standard Gang Drill – 40×70R (Two-Piece) | R | ★ |
| B02004037 | Standard Gang Drill – 42×70L (Two-Piece) | L | ★ |
| B02004038 | Standard Gang Drill – 42×70R (Two-Piece) | R | ★ |
| B02004039 | Standard Gang Drill – 45×70L (Two-Piece) | L | ★ |
| B02004040 | Standard Gang Drill – 45×70R (Two-Piece) | R | ★ |
| B02004041 | Standard Gang Drill – 50×70L (Two-Piece) | L | ★ |
| B02004042 | Standard Gang Drill – 50×70R (Two-Piece) | R | ★ |
What Materials Can a Hinge Boring Bit Drill?
The hinge boring bit drill is ideal for working with various types of wood, but it can also be effective on certain soft materials. Its design ensures a fixed drilling depth without piercing through the board, making it easy to install a variety of recessed hardware.
1. Wood and Wood Composites (Primary Use)
This is the core application for hinge bits. The quality of the cut often depends on whether the bit is made of High-Speed Steel (HSS) or Tungsten Carbide Tipped (TCT):
-
Softwoods: (e.g., Pine, Cedar) Easy to drill with any standard hinge bit.
-
Hardwoods: (e.g., Oak, Walnut, Maple) TCT bits are highly recommended here, as the high density of these woods can quickly overheat and blunt standard steel bits.
-
Engineered Wood:
-
MDF (Medium Density Fiberboard): Drills very easily but is abrasive; carbide tips last much longer.
-
Particle Board (Chipboard): The sharp spurs of the bit are essential here to prevent the edges of the hole from crumbling.
-
Plywood: Capable of shearing through cross-grain layers without tearing or delaminating the sheets.
-
2. Coated and Laminated Materials
-
Melamine / Laminates: Hinge bits are excellent for these because the outer cutting spurs score the surface laminate before the main lifters remove the waste. This ensures a chip-free edge.
-
Veneered Boards: They maintain the integrity of thin wood veneers without lifting the edges.
3. Certain Plastics
-
Soft to Medium Plastics: Including PVC, Acrylic (PMMA), and HDPE.
-
Note: You must lower the RPM (speed). If the drill spins too fast, the friction heat will melt the plastic, causing it to gum up the bit and ruin the finish.
-
4. Materials to AVOID
Hinge bits are fragile by design and should never be used on:
-
Metals: Whether aluminum, steel, or iron, metal will instantly destroy the cutting edges.
-
Masonry/Stone: The bits cannot handle impact or the abrasive nature of stone.
-
Glass or Ceramics: These will shatter the material and ruin the tool.
Hinge Boring Bit (Cup/Forstner Bit) Material Compatibility Table
| Material Category | Examples | Suitable? | Recommended Bit Type | Key Operating Tip |
| Natural Wood | Pine, Oak, Walnut | YES | Tungsten Carbide (TCT) | Control speed on hardwoods to prevent burning. |
| Engineered Wood | MDF, Particle Board, Plywood | YES | Tungsten Carbide (TCT) | MDF is abrasive; carbide tips last much longer. |
| Surface Finishes | Melamine, Laminates, Veneer | YES | Bit with sharp spurs | Spurs must score the surface first to prevent chipping. |
| Plastics | PVC, Acrylic (PMMA), HDPE | LIMITED | HSS or TCT | Use very low RPM to prevent melting. |
| Metals | Aluminum, Steel, Iron | NO | – | STRICTLY PROHIBITED; will shatter the blade. |
| Masonry | Tiles, Concrete, Brick | NO | – | STRICTLY PROHIBITED; bit will be ruined instantly. |
| Glass | Plate glass, Tempered glass | NO | – | STRICTLY PROHIBITED; causes shattering. |
Can You Use a Regular Drill Instead?
While you can use a regular handheld drill, it is actually quite difficult to handle and carries a high risk of mistakes.
The biggest headaches are keeping the drill straight and controlling the depth. Because this type of bit lacks a long guiding tip, it tends to slide or wander across the smooth board surface the moment you start, which ruins the hole alignment.
Also, if your hand isn’t perfectly steady, it is hard to stop precisely at a depth of about 12 millimeters, and a slight slip could result in drilling right through the door.
If you must use a handheld drill, it is best to use a specific hinge jig to help hold the position and stop frequently to check your depth so you don’t ruin an expensive door.
When Should You Use a Hinge Boring Bit?
Essentially, you should use a hinge boring bit whenever you need to install European-style concealed hinges or cup hinges on wooden panels. The sole purpose of this specific bit is to create a flat-bottomed, large-diameter, and depth-precise blind hole.
Unlike a regular twist drill bit, which creates a pointed hole and would likely pierce through the door, a hinge boring bit ensures the edges remain clean and splinter-free, allowing the hinge cup to sit perfectly flush and secure.
It is an indispensable tool whenever you are building kitchen cabinets, wardrobes, or any furniture project that requires hidden hinges.
Conclusion
Choosing the right hinge boring bit is crucial for making cabinets and furniture look professional. Whether you’re working on a DIY project at home or in a factory, this specialized bit ensures that concealed hinges are installed securely and accurately without damaging the door panels.
Before starting, it’s important to match the bit to the material. For engineered boards like MDF, a carbide-tipped bit is more wear-resistant.
For natural solid wood, a high-speed steel bit produces smoother holes. Picking the right bit extends the life of your tools and ensures precise workmanship. While the 35mm size is most commonly used, hinge boring bits are better suited for hinge installation than ordinary Forstner bits, offering more control and ease of use.
To achieve professional results, it’s best to use the bit with a drill press or a dedicated hole-positioning jig. This ensures that holes are perfectly aligned and maintain consistent depth.
Consider choosing the ZC Tools industrial-grade hinge boring bit series for precise, reliable drilling every time.