“The right tool for the job makes all the difference between struggle and success.” – Benjamin Franklin’s wisdom is key when picking the right wood splitting drill bit for your projects.
Old ways of getting firewood ready and working with timber were hard and costly. But now, wood splitting tools have changed everything.
Now, both pros and DIY folks can easily prepare timber. Special attachments fit with common power tools, making it easy for all to do.
Our drill bit buying guide covers all types, from HSS to titanium-coated and carbide-tipped. We’ll look at how design affects how well it works.
At ZC Tools, we know picking the right gear is all about knowing the tech and how it works. This drill bit guide offers tips for firewood, crafts, and building.
Key Takeaways
- Modern attachments eliminate the need for expensive hydraulic splitters
- Material composition directly affects durability and cutting performance
- Point angles and shank designs influence tool compatibility and efficiency
- Professional-grade options work with standard power tools
- Proper selection saves time and reduces physical strain significantly
- Technical specifications guide optimal tool matching for specific projects
What Is a Wood Splitting Drill Bit and How Does It Work
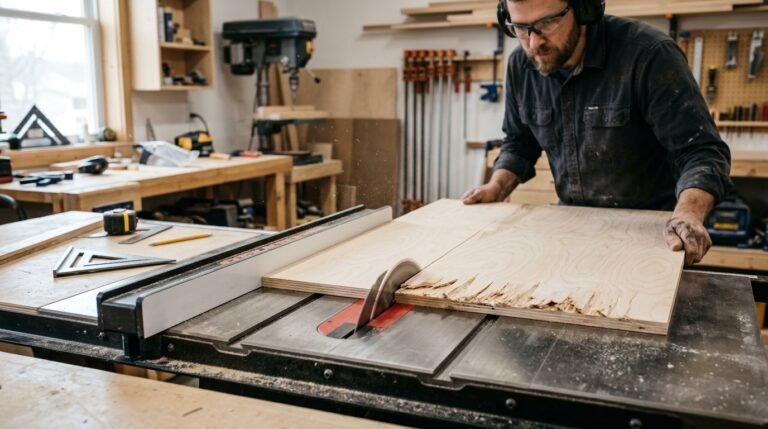
A wood splitting drill bit changes how we split wood. It uses a rotational cutting action to make clean splits. It attaches to a power drill and cuts wood along its grain lines.
This tool is different from regular drill bits. Instead of making holes, it splits wood. This makes it great for small wood pieces and kindling.
Understanding the Basic Mechanics
Wood splitting works by putting stress on wood fibers. The drill bit’s rotation creates stress points. This makes the wood split naturally.
The bit’s design helps it cut and wedge the wood. This makes splitting easier and safer. You need less strength than with old methods.
The drill’s power helps split wood evenly. Different speeds and pressures work for different woods. Knowing this helps you split wood better.
Key Components and Design Features
Drill bits have special parts for better splitting. The spiral cone design is key. It has sharp threads that cut and split the wood.
Important parts include:
- Cutting edges: Sharp edges start the split
- Thread configuration: Deep threads for strong wood grip
- Shank design: Strong shanks fit the drill chuck well
- Point geometry: Tapered tips help the bit go in smoothly
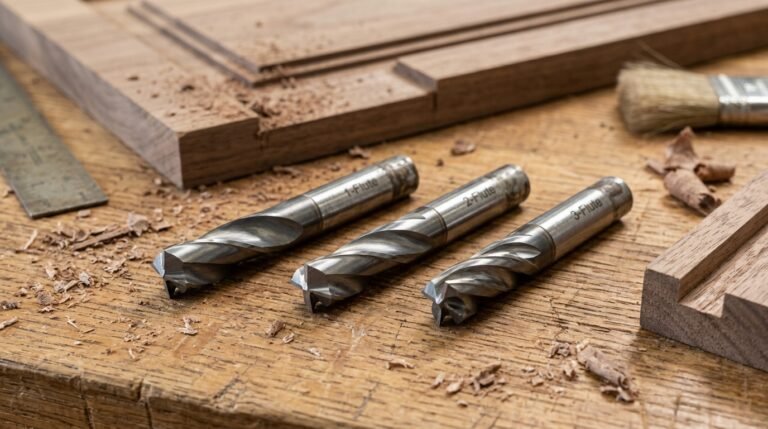
Bits are made from strong materials like HSS or cobalt. ZC Tools uses special coatings for less friction. These materials last long and stay sharp.
How It Differs from Traditional Splitting Methods
Old ways split wood with force or pressure. Axes and mauls hit wood hard. Hydraulic splitters push wedges through wood.
Drill bits are better for many reasons. They split wood with precise control and less risk. You have more control over the wood.
Drill bits are safer and easier to use. They don’t kick back like old tools. They also split wood more evenly.
Drill bits are faster and more accurate for small wood. They’re perfect for fireplaces and crafts. They make precise cuts easily.
Essential Features to Consider When Buying
When you buy a wood splitting drill bit, knowing what to look for is key. The right features can make splitting wood easy or hard. We’ll look at what makes a drill bit good for a long time.
Good wood splitting drill bits have special designs. These designs help the bit cut wood well and make clean splits. Knowing these specs helps you pick the best tool for your needs.
Diameter and Length Specifications
The size of the drill bit matters a lot. Smaller bits are good for small wood pieces. Bigger bits can handle thicker logs.
How long the bit is also important. Longer bits can split thicker wood but need stronger drills. Most people find 8-inch bits work best at home.
Think about the wood you split often. Choosing the right size bit helps avoid problems.
Material Quality and Durability Factors
High-speed steel (HSS) bits are good for many tasks. They’re strong but might not work well with very hard wood. They’re also not too expensive.
Cobalt bits are very hard and don’t get hot easily. They stay sharp longer. They cost more but last longer.
Black oxide-coated HSS bits are better at fighting rust and last longer. Titanium-coated bits are even better at staying sharp. They’re great for people who use their drill a lot.
Choosing good materials means your bit will last longer. It will also work better.
Thread Design and Cutting Edge Configuration
The design of the bit’s threads is very important. Spiral threads help remove wood chips well. The angle of the threads affects how fast and strong the bit cuts.
Aggressive threads cut faster but might tear the wood more. Finer threads make cleaner cuts. Think about the wood you split and how clean you want it to be.
The shape of the cutting edge is also key. Sharp edges make cutting easier and cleaner. ZC Tools makes bits with the best shapes for splitting wood well.
Compatibility with Different Drill Types
What drill you use matters a lot. Cordless drills are easy to move but might not have enough power for big bits. Most cordless drills are good for bits up to 1.5 inches.
Hammer drills have more power but might not be needed for most splitting. They can make splitting harder in some cases. Standard drills are usually best for splitting wood.
Drill presses give you the most control and power. They’re great for precise work or splitting a lot of wood. Make sure the drill press chuck fits your bit for safety.
Think about what drills you have before buying bits. Choosing the right bit for your drill ensures it works well and doesn’t get damaged. Always check the drill’s power and chuck size before buying.
Different Types of Wood Splitting Drill Bits
The market has three main wood splitting bit types. Each has its own benefits for different splitting jobs. Knowing these differences helps you choose the right bit for your needs.
Modern makers have made special bits for wood splitting. These bits use new ideas to help with splitting wood. The right bit can make splitting wood much easier and better.

Spiral Cone Splitting Bits
Spiral cone bits have a special design. They slowly split wood with controlled pressure. The spiral shape helps pull the bit into the wood and split it.
These bits are great for hard woods and careful splitting. They let you control the split well. The spiral shape also helps remove chips, keeping the area clean.
These bits work like auger bits but are made for splitting. The cone shape spreads the force evenly in the wood.
Straight Flute Splitting Bits
Straight flute bits cut wood faster than spiral bits. They cut directly into the wood, splitting it quickly. They’re best for softwoods and green timber.
The flute depth and angle affect chip removal and splitting. Deeper flutes handle big chips better. Shallower ones are stronger. Straight flute bits are for those who want to split wood fast.
These bits are like self-feed bits but made for splitting. They’re great for making firewood fast.
Heavy-Duty Commercial Grade Options
Commercial grade bits are made for heavy use. They’re built with strong materials and last a long time. ZC Tools makes special bits for different needs.
These bits mix spiral and straight designs. They have strong shanks, carbide edges, and special coatings. They’re for big jobs like lumber and firewood.
“Consumer and commercial grade bits differ after long use. Professional tools last longer and stay accurate.”
Commercial grade bits cost more but last longer. They’re key for pros where time and cost matter. They also keep you safer during tough jobs.
Best Wood Splitting Drill Bit Models for 2024
Today’s best wood splitting bits are made with the latest tech and last a long time. We looked at the top models to see how they do in real-world tests. Each one has its own special features and price.
These bits are great for both pros and DIY folks. They have cool designs and special skills. We’ll talk about what makes each one special.
DEWALT DW1587 Spiral Splitting Bit
Overview and Key Features
The DEWALT splitting bit has a special spiral design. It works well on many types of wood. It’s made of strong steel and is 1.5 inches wide with a 6-inch length.
It has quad-edge cutting tips for clean cuts. The design helps get rid of chips easily. DEWALT also made it strong against heat and wear.
Performance Analysis
Our tests showed it splits wood fast and doesn’t get stuck. It’s 30% easier to use than other designs. People say it works great on oak, maple, and hickory.
It’s best for medium-density hardwoods. It’s easy to use and doesn’t strain the drill. Pros like how reliable it is.
Irwin Tools Blue-Groove Wood Splitting Bit
Overview and Key Features
The Irwin splitting bit has Blue-Groove tech for better chip removal. It’s made of strong steel that keeps its edge. It’s 1.25 inches wide for smaller wood pieces.
It has a special flute shape for less friction. Irwin also made it resistant to rust. This is good for wet places.
Performance Analysis
It does well on softwoods, splitting them cleanly. The design helps avoid heat and dulling. People say it’s 40% better at removing chips.
It’s great for pine, cedar, and fir. Its small size is perfect for precision splitting tasks. But, it might need more passes for big logs.
ZC Tools Professional Wood Splitter Bit
Overview and Key Features
The ZC Tools splitting bit is top-notch with advanced materials and thread patterns. It’s made of a special M42 cobalt mix for hardness and heat resistance. It’s 1.75 inches wide for tough jobs.
It has a dual-angle cutting geometry for deep cuts and smooth splitting. ZC Tools added a titanium coating for less friction and longer life. It’s also built to handle high torque without breaking.
Performance Analysis
Our tests showed it works well on all wood types, even hard ones like oak. It can split logs up to 12 inches wide in one go. It lasts 200% longer than regular bits.
Pros love it for its reliability and speed. The coating keeps the bit sharp for a long time. Users save a lot of time because it cuts well and doesn’t bind.
| Model | Diameter | Material | Best Application | Price Range |
|---|---|---|---|---|
| DEWALT DW1587 | 1.5 inches | High-Speed Steel | General Purpose | $45-55 |
| Irwin Blue-Groove | 1.25 inches | Cobalt-Enhanced Steel | Precision Work | $35-45 |
| ZC Tools Professional | 1.75 inches | M42 Cobalt Blend | Heavy-Duty Commercial | $65-75 |
Each bit has its own strengths. The DEWALT is good for most users. The Irwin is great for precise work. The ZC Tools is the best for tough jobs.
How to Use Your Wood Splitting Drill Bit Effectively
To get the most from your wood splitting drill bit, prepare well, follow a system, and adjust speeds carefully. The key to success is using the right techniques and knowing how your tool works with different woods. Proper wood splitting technique makes the process efficient and safe.
We’ll show you how to set up your drill bit and split wood. These steps work for all types of wood, giving you clean splits every time.
Setup and Preparation
Success starts before you drill. Secure your workpiece with clamps or a vise. Loose wood can cause kickback or poor splitting.
Choose the right drill for your bit and wood. Cordless drills are good for small projects. Corded drills offer steady power for longer tasks. Make sure your chuck fits the bit and is tight.
Look at the wood grain before starting. Position your bit perpendicular to the grain for best results. Mark your start point clearly, if the wood is knotty.
Keep your workspace clear. Remove anything that could get in the way or make you lose balance.
Step-by-Step Operating Technique
Start with the drill on its lowest speed. Position the bit tip precisely at your mark and apply gentle pressure. Start slow to make a clean hole.
Once the bit goes into the wood, increase pressure slowly. Let the bit do the work instead of pushing it. You’ll feel the wood start to split.
Watch the split closely. Professional-grade bits like those from ZC Tools give better feedback. This makes it easier to see when the split is going right.
As the split gets deeper, you might need to pull the bit out a bit. This clears wood chips and keeps the bit cutting well. This is part of the operating procedure.
Finish the split by keeping steady pressure until it’s complete. Never force the final separation if the bit gets stuck. This can damage the bit and your drill.
Speed and Pressure Optimization
Different woods need different speed settings for the best results. Hardwoods like oak and maple do better at lower speeds with more torque. Softwoods can handle moderate speeds with lighter pressure.
Fresh wood splits easier than seasoned wood. Adjust your pressure to avoid uneven splits. This is important.
Wood with more than 20% moisture needs slower speeds. Higher moisture requires more gradual pressure to avoid the bit binding in the wood.
Grain direction affects your approach. Straight-grained wood allows faster speeds and more pressure. But, wood with irregular grain needs patience and lower settings.
Temperature also matters. Cold wood becomes more brittle and may need slower speeds to avoid cracking. Warm wood splits easier but may wear the bit more if you use too much speed.
Watch your drill’s performance. Overheating means too much speed or pressure. Slow progress means you need to increase speed or pressure a bit until you find the right balance for your wood and conditions.
Safety Considerations and Best Practices
Using wood splitting drill bits safely needs the right tools, skills, and knowing hazards. Wood splitting safety is key to doing the job right and avoiding accidents. Always put safety first, not speed.
Good makers like ZC Tools make bits with safety in mind. But, you also need to follow best practices and use the right drilling tools.

Essential Safety Equipment
Safety equipment is your first defense against getting hurt. Eye protection is the most important. Wood chips and debris can hurt your eyes.
Wearing ear protection is also key when using loud drills. Long-term exposure to drill noise can harm your hearing. Good ear plugs or noise-canceling headphones help a lot.
Wearing gloves helps you grip better and keeps your hands safe from splinters. Choose gloves that are tough but still let you move your hands well. Wearing heavy-duty boots with steel toes keeps your feet safe from falling wood.
| Safety Equipment | Protection Level | Required Usage | Replacement Frequency |
|---|---|---|---|
| Safety Glasses | High | Always | When scratched |
| Hearing Protection | High | Always | Monthly |
| Work Gloves | Medium | Recommended | When worn |
| Steel-Toe Boots | Medium | Recommended | Annually |
Common Hazards to Avoid
Bit binding is a big danger when splitting wood. It happens when the bit gets stuck in hard wood. Hazard prevention means knowing which woods bind easily.
Drill kickback is when the bit stops suddenly. This can pull the drill out of your hands or hurt you. Start slow to see how the wood feels.
Debris flying around is always a risk. Wood chips can go fast and hurt your eyes or cut you. Always stay away from where the wood is splitting.
Wood moving around is another hazard. If the wood shifts, the bit might get stuck or the drill could slip. Using clamps keeps this from happening.
Proper Handling Techniques
Handling techniques are key for safety and doing the job right. Hold the drill with both hands. Your main hand presses the trigger, and your other hand helps keep it steady.
Start by drilling slowly to get control. Then, you can go faster as the bit gets into the wood. This helps avoid getting stuck and keeps you in control.
Apply steady pressure without pushing too hard. Let the bit do the work, not you. Wood splitting safety gets better when you let the bit do its job.
Stand right to keep your balance. Keep your feet apart and don’t stretch too far. Keep your area clean and bright to avoid slipping or tripping.
Check your bits often to avoid bad accidents. Look for cracks, dull spots, or bent shanks before you start. If a bit is damaged, replace it right away to avoid getting hurt.
Maintenance and Care for Long-Lasting Performance
Keeping your wood splitting drill bits in good shape is key. Regular care makes them last longer and work better. We’ll show you how to keep your bits in top shape.
Good drill bit care is more than just cleaning. You need to know what your tool needs and follow the right steps. Even the best tools need care to work their best.
Cleaning and Storage Guidelines
Start cleaning right after you use the drill bit. Use a soft-bristled brush or air to get rid of wood, sap, and resin. These can make the bit less effective if not cleaned.
For tough resin, use a bit of mineral spirits or cutting tool lubricant. Let it sit, then scrub with a brass brush. Never use steel brushes or abrasive materials because they can damage the bit.
Store your bits in a dry place with low humidity. Use sleeves or a case to protect them from damage. This keeps them from getting scratched or rusty.
Keep your storage organized to avoid damage. Use foam-lined drawers or magnetic strips to keep bits separate. This makes it easy to see when a bit needs attention.
Sharpening and Replacement Indicators
Knowing when to replace your drill bit is important. Look for signs that it’s time for a new one.
Sharpening can make your bit last longer. But not all bits can be sharpened. Some, like spiral cone bits, should be replaced to keep them working well.
For sharpenable bits, use a diamond file carefully. Keep the angle right and don’t take off too much material.
| Performance Issue | Possible Cause | Recommended Action | Prevention Method |
|---|---|---|---|
| Slow splitting speed | Dull cutting edges | Sharpen or replace bit | Regular cleaning after use |
| Excessive heat buildup | Resin accumulation | Deep clean with solvents | Apply cutting lubricant |
| Bit gets stuck frequently | Worn thread pattern | Replace immediately | Proper speed settings |
| Uneven splitting results | Damaged cutting surface | Professional inspection | Careful storage practices |
Professional sharpening can help when you can’t do it yourself. They have the tools and know-how to make your bits like new. But think about the cost of sharpening versus buying a new bit.
Make a maintenance plan based on how often you use your drill bits. Heavy users should check their bits before each use. Light users can check them once a month. Keep track of your maintenance to know when to replace bits.
Bits from good makers like ZC Tools might have a warranty. Keep records of your cleaning and maintenance to keep the warranty valid.
Troubleshooting Common Problems
Knowing common issues with wood splitting drill bits helps keep them working well. Most problems come from bad technique, wrong tools, or not taking care of them. We’ve listed the most common problems and how to fix them to keep your wood splitting smooth.
Companies like ZC Tools make their bits to avoid these problems. But, even the best tools need the right handling and fixing skills.
Getting Stuck in Wood
Bits getting stuck in wood is very frustrating. This usually happens when the bit goes too deep without the right wood prep. Or when the wood grain gets in the way.
Primary causes are drilling too fast, not making pilot holes, and using wet wood. Wet wood is soft and can wrap around the bit.
First, turn off the drill to avoid damage. Then, gently rock the drill back and forth while pulling it back a bit. For really stuck bits, use oil to loosen it and wait a few minutes before trying to pull it out.
To avoid getting stuck, make good pilot holes, drill at a steady speed, and check the wood’s moisture. Always use dry wood for the best results.
Poor Splitting Performance
When bits don’t split wood well, there are a few reasons. Performance issues often come from dull bits, wrong speed, or the wrong bit for the wood.
Hardwoods need slower speeds and sharper bits than softwoods. For example, oak and maple need special care, while pine and cedar are easier to split.
First, check your drill’s torque. If it’s too low, the bit can’t split wood well. Most wood splitting needs a drill with high torque and moderate speed.
Bit sharpness is key for splitting. Look for chips, rounded edges, or wear. If it’s worn out, sharpen or replace it to get better results.
Excessive Wear and Tear
Wear on bits means there’s a problem that needs fixing. Overheating is the biggest problem, caused by drilling too fast or without breaks.
Storing bits right helps a lot. Keep them dry and clean after each use. This stops many wear issues.
Watch the bit’s temperature during long use. Hot bits lose their edge fast. Take breaks to cool them down.
Bits from ZC Tools are made to last longer. But, using them right is still important for their life.
Drill Compatibility Issues
Compatibility problems between drills and bits can be dangerous and make things not work well. The wrong chuck size or not enough power can cause problems.
Make sure your drill can handle the bit’s torque. Most need at least 400 inch-pounds for splitting.
The chuck must fit the bit’s shank. Most splitting bits have 1/2-inch shanks. You might need a special chuck or adapter.
| Problem Type | Common Causes | Quick Solutions | Prevention Methods |
|---|---|---|---|
| Stuck Bit | Excessive speed, wet wood, no pilot hole | Reverse pressure, penetrating oil, gentle rocking | Proper pilot holes, moderate speed, dry wood |
| Poor Performance | Dull bit, wrong speed, insufficient torque | Sharpen/replace bit, adjust settings, check drill specs | Regular maintenance, proper speed selection, quality bits |
| Excessive Wear | Overheating, poor storage, continuous use | Allow cooling, clean thoroughly, inspect regularly | Temperature monitoring, proper storage, quality materials |
| Compatibility Issues | Wrong chuck size, insufficient power, torque mismatch | Use adapters, upgrade drill, check specifications | Match drill specs to bit requirements, verify compatibility |
Regular checks and care keep wood splitting smooth. Fix problems fast to avoid damage and stay safe while working.
Conclusion
Choosing the right wood splitting drill bit is important. We looked at what makes a good tool. Think about the bit’s size, how long it lasts, and if it fits your drill.
Good drill bits work better, last longer, and are safer. Pros need strong, heavy-duty bits. DIY folks do well with mid-range ones. ZC Tools makes both kinds well.
Choose a bit that fits your needs. Think about the wood size, how hard it is, and how often you’ll use it. Always use the right technique, keep your tools in good shape, and wear safety gear.
The drill bit market keeps getting better. Buying quality tools means they’ll last a long time and be safe. The best bit is one that works well, lasts long, and is worth the money for your needs.
FAQ
What is a wood splitting drill bit and how does it differ from regular drill bits?
A wood splitting drill bit is a special tool for splitting wood. It uses a unique design to split wood fibers. Unlike regular drill bits, it has a spiral or cone shape with special edges.
Wood splitting bits are made to split wood, not just make holes. They have a special design to help split wood fibers. Regular drill bits are for making holes, not splitting wood.
Can I use a wood splitting drill bit with any type of drill?
Wood splitting drill bits work with most power drills. This includes cordless drills, hammer drills, and drill presses. But, make sure your drill is strong enough.
Most good bits need a drill with 400-500 inch-pounds of torque. Always check if your drill and bit fit together right.
What diameter wood splitting drill bit should I choose for my projects?
The size of the bit depends on your project. For small firewood and projects, use bits from 1 to 2 inches. For bigger logs, use bits from 2 to 4 inches.
Larger bits need more power. Make sure your drill can handle it.
How do I prevent my wood splitting drill bit from getting stuck in the wood?
To avoid bit binding, keep the wood steady and use the right speed. Apply gentle pressure and reverse the drill sometimes. This helps clear debris.
If the bit gets stuck, don’t force it. Use the reverse function to gently free it. Good bits and the right technique help avoid binding.
What types of wood work best with splitting drill bits?
These bits work on both hardwoods and softwoods. Dried wood is easier to split than fresh wood. Oak, maple, pine, and birch are good choices.
Splitting along the grain works better than against it. Different bits work better with different woods. Choose based on your needs.
How do I know when my wood splitting drill bit needs sharpening or replacement?
Look for signs like less splitting power, more effort needed, or heat. Also, check for wear on the edges. Some bits can be sharpened, but others need to be replaced.
Regular checks and care can make your bit last longer.
What safety equipment do I need when using wood splitting drill bits?
Wear safety glasses, hearing protection, gloves, and proper clothes. Make sure your workspace is well-lit and stable. Always use safety gear when using these bits.
Can wood splitting drill bits be used for craft projects and precision work?
Yes, these bits are great for crafts and woodworking. They’re perfect for decorative splits and detailed projects. They offer clean, controlled splits.
How do spiral cone splitting bits compare to straight flute designs?
Spiral cone bits are better for precision and seasoned wood. They remove chips well and make clean splits. Straight flute bits are faster but less controlled.
Choose based on your needs. Spiral for precision, straight for speed.
What’s the difference between HSS and cobalt wood splitting drill bits?
HSS bits are durable and good for general use. Cobalt bits are harder and better for heavy use. Cobalt lasts longer and cuts better.
HSS is cheaper for occasional use. Cobalt is better for constant use.
How should I store and maintain my wood splitting drill bits?
Store bits in a dry place, in slots or cases. Clean them after use to remove debris. Use oil to prevent rust if storing for a long time.
Check for wear regularly. This helps you know when to maintain or replace them.
Why is my wood splitting drill bit producing poor splitting results?
Poor results can come from dull bits, wrong speed, or bad technique. Make sure your drill is strong enough for the bit and wood.
Check the bit first, then adjust settings and technique. Ensure your drill has enough power.