Ever wonder why your cuts aren’t precise? Or why cutting soft woods is hard? The issue could be the blade. A dull blade can slow down your miter saw and be unsafe. This guide shows how to change the blade safely and quickly.
A sharp blade keeps your miter saw working well. Blades from new saws are okay to start. Yet, better blades improve your cutting. To know when to change the blade, check for chipping or burn marks. This guide also helps pick the right size blade and follow safety steps.
If you like woodworking or DIY projects, this blade change guide is a must. It teaches a fast, easy, and safe way to change blades. This keeps your cuts sharp and projects looking great.
Key Takeaways
- Recognize the signs indicating it’s time for a miter saw blade change.
- Understand the importance of selecting the correct blade size and quality from reputable manufacturers.
- Follow a quick and easy, step-by-step guide to switch out blades on a miter saw.
- Learn the essential safety protocols for safely swapping blades to ensure a secure operation.
- Familiarize yourself with the necessary steps for a proper miter saw maintenance routine.
Introduction: The Importance of a Sharp Blade
In woodworking and construction, a miter saw’s efficiency relies on its blade condition. A sharp blade ensures clean, precise cuts, highlighting its importance. Proper maintenance and timely blade replacement are crucial to maintain work quality.
Understanding the Role of the Blade in a Miter Saw
A miter saw’s performance depends on its blade’s sharpness. The blade’s teeth cut through wood, metal, or plastic accurately. It’s not just about cutting, but making sure cuts are precise and clean.
Indicators That It’s Time for a Blade Change
Knowing when to replace the blade keeps the miter saw working well. Signs like chipping, burn marks, or less precise cuts mean it might be time for a new one. Regular checks help prevent material damage and keep your saw lasting longer.
How to Change a Saw Blade on a Miter Saw
Changing the blade on a miter saw is crucial for anyone wanting to keep their tool in tip-top shape. When you focus on saw maintenance, you make sure your saw cuts well and lasts longer. Here, we’ll show you how to switch blades yourself, no matter your skill level.
Before you start, gather all the tools you need and get to know your saw’s design. Being prepared helps avoid accidents and makes changing the blade easier. This guidance is great for pros and DIY fans alike. It saves time and makes your woodworking better.
- Ensure the miter saw is turned off and unplugged from the power source.
- Lock the blade to prevent rotation, using either the pin or blade lock mechanism on your saw.
- Carefully remove the blade guard to access the blade.
- Loosen and remove the blade bolt, typically located in the center of the blade, using the appropriate wrench.
- Replace the old blade with a new one, making sure it is securely fastened and the teeth are facing the correct direction for cutting.
- Reattach the blade guard and make sure all components are secure before testing the saw.
This guide isn’t just for safety; it also makes your miter saw work better. Keeping up with maintenance, like changing blades, is key to your power tools’ performance. Always check the manufacturer’s instructions for your saw model to boost safety and efficiency in maintenance.
Tools and Materials Needed for Blade Replacement
When you want to change a miter saw blade, you need the right tools. It’s important for safety and getting the job done right. First, know what you need for your particular task.
Identifying the proper tools
Start with a well-stocked toolbox for blade swapping. You’ll need a wrench to unlock the blade bolt. A screwdriver might also be needed, depending on your saw. Always include safety gloves to protect your hands.
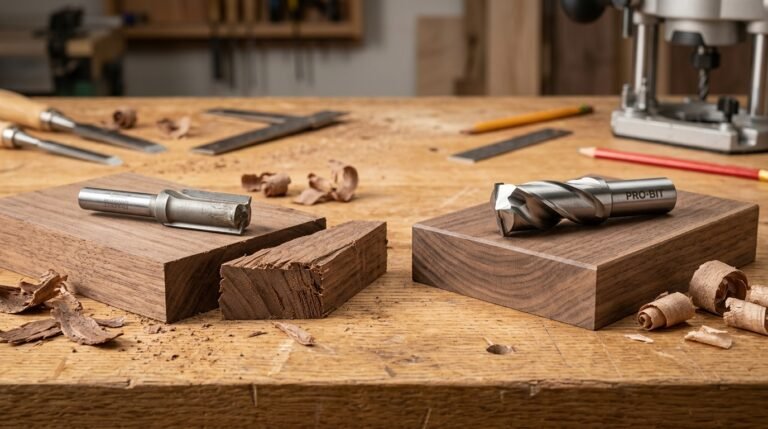
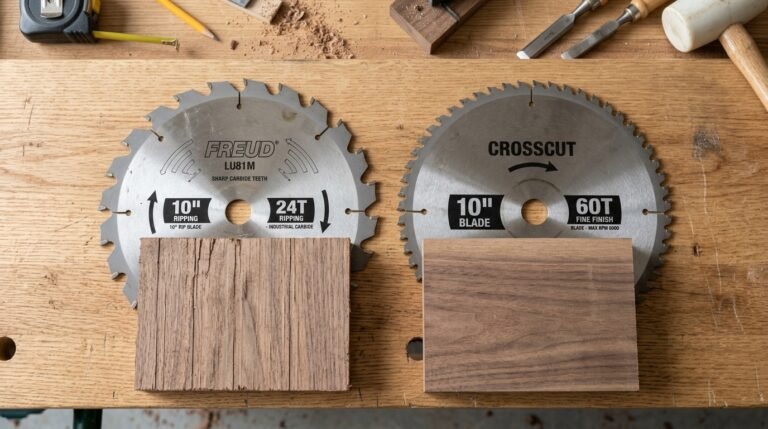
Selecting the right blade for your saw and project
Finding the right blade is about matching it to your project. Consider the blade’s diameter and tooth count. A higher tooth count means smoother cuts, especially for fine woodwork.
Materials needed for this task include the right tools and knowing how to use them safely.
| Tool or Material | Description | Use |
|---|---|---|
| Wrench | Usually included with your saw | To loosen/tighten the blade bolt |
| Safety Gloves | Heavy-duty fabric or leather | To protect hands during blade change |
| Screwdriver | May be needed for some models | For adjusting components |
| Miter Saw Blade | Specific to material and cut type | Replacement blade suited for specific projects |
Having the correct tools makes changing a blade easier. This applies to regular maintenance or upgrading. It ensures better results and a safer workspace.
Step-by-Step: Removing the Old Blade
Before you start taking off the old blade from your miter saw, make sure everything is safe. First, unplug the saw from its power source. This is very important to keep yourself safe. It stops the saw from accidentally turning on and causing injuries.
To begin taking off the blade safely, you have to know your miter saw. Most saws have a simple lever or knob to open the blade guard. Use it carefully to avoid breaking anything. If it seems hard or confusing, look at the manual that came with your saw. There, you’ll find all the steps explained.
- Ensure the miter saw is firmly switched off and unplugged from the power outlet.
- Verify the disconnection by attempting to power on the saw to confirm it remains non-operational.
- Proceed to safely removing the blade guard, following the instructions specific to your saw model.
| Step | Description | Details |
|---|---|---|
| 1 | Power Off | Ensure saw is completely shut down and disconnected from power source. |
| 2 | Guard Removal | Release the blade guard using the designated release mechanism on your saw. |
| 3 | Double-Check | Pull the saw’s trigger to ensure it doesn’t start, confirming the saw is unplugged. |
Placement and Alignment: Installing the New Blade
It’s very important to place and align a new miter saw blade correctly. Doing this ensures your cutting is efficient and safe.
First, you must align the new blade with care. This step is key for making your cuts work well. Make sure the blade is flat and fits well on the arbor.
The way the blade teeth face is important too. They should point down, going the same way as the blade spins. This helps your cuts be accurate and keeps you safe from kickback.
| Step | Description | Importance |
|---|---|---|
| Place Blade | Meticulously position the blade on the spindle, ensuring it is securely seated against the inner washer. | Crucial for secure blade attachment and optimal cutting action. |
| Check Alignment | Verify that the blade is precisely aligned on the spindle to avoid any wobbles or uneven cuts. | Essential for maintaining the stability and accuracy of cuts. |
| Confirm Teeth Orientation | Ensure the blade teeth are oriented downwards, perfectly syncing with the saw’s rotational direction. | Central to achieving clean, accurate cuts and ensuring safety during operation. |
Reassembling the Saw: Guard and Power Connection
After putting in a new blade, you must do two things next. You need to attach the blade guard and make sure the power connection is safe. These steps are very important. They make sure your miter saw works right and is safe to use.
First, let’s put the blade guard back on the miter saw. This part is very important. It keeps you from accidentally touching the spinning blade. Here is how to correctly attach the blade guard. Make sure it’s on tight and right.
- Put the blade guard over the blade, but don’t let it block the blade’s path.
- If your saw uses screws for the guard, line up the holes and tighten the screws well.
- Try moving the guard gently to check it’s really tight.
Next, it’s time to reconnect the power. Before you plug in the saw, check everything carefully. You want to make sure it’s all aligned and tight. Here’s how to check the power connection is safe:
- Look at the power cord to make sure it’s not broken or hurt.
- Check the power switch is off before you plug it in.
- After plugging in, look closely to see if anything is too close to the blade.
Doing these checks helps stop accidents. It also helps your miter saw last longer. Safety should always come first when you use your machine. Below is a quick guide. It goes through the key steps of putting your miter saw back together.

| Step | Action | Detail |
|---|---|---|
| 1 | Attach Blade Guard | Make sure the guard is in the right place and doesn’t touch the blade. |
| 2 | Connect Power | Check the cord, turn the switch off, and plug it into the outlet. |
| 3 | Safety Check | Make sure everything is tight and there’s nothing close to the blade. |
If you follow these steps carefully, your miter saw will be safe and work well. Remember, taking care of your saw and being safe are the best ways to keep it working smoothly.
Tuning and Testing: Ensuring Accurate Cuts
When you attach a new blade to your miter saw, make sure it’s set up right. This means making sure your saw is tuned and you’ve tested it with trial cuts. Doing this improves your cutting accuracy. It helps you make sure
your miter cuts are spot-on every time.
First, make sure your saw is adjusted right. Check the saw’s base with the blade to be sure it’s square. If not, your cuts might not be accurate. This step is really important. Also, get your angle cuts right by adjusting the bevel settings.
Next is the test cutting part. Use scrap material for this. It lets you see if your settings are correct. This is a must-do step. It helps you find and fix any mistakes. This way, you can adjust the saw just right before you start your real work.
Key aspects of this process include:
- Checking blade alignment
- Adjusting the bevel setting if needed
- Examining and readjusting the blade for squareness and accuracy
For more info, see this detailed table. It compares different test results and what adjustments to make:
| Test Cut Type | Observed Outcome | Required Adjustment |
|---|---|---|
| 45° Angle Cut | Slight Deviation on Right Side | Adjust Right Miter Angle |
| 90° Straight Cut | Minimal Offset | Check Blade Squareness |
| Bevel Cut | Undercut | Increase Bevel Angle Slightly |
Using these tuning and testing methods makes your miter saw work better. This is key for any woodworking or building project. By correctly adjusting and testing your tool, you ensure each cut is precise. This leads to better workmanship and faster job completion.
Blade Maintenance Tips
Making sure your miter saw works well means you need to take care of the miter saw blade maintenance regularly. This includes cleaning the blade well to get rid of buildup. You should also think about whether to sharpen or replace the blade, depending on how it looks and works.
Keeping up with maintenance keeps the blade sharp. It also stops damage that might make you replace it too soon. Here are some tips to keep your miter saw blade in top shape.
| Maintenance Action | Purpose | Frequency |
|---|---|---|
| Cleaning with specialized solutions | Remove resin, pitch, and debris | After every significant use |
| Visual inspection for wear or damage | Assess need for sharpening or replacing | Monthly or after heavy usage |
| Blade sharpening | Restore edge sharpness | Annually or as needed based on blade performance |
| Blade replacement | Maintain optimal cutting efficiency | When sharpening no longer restores performance |
Sticking to a maintenance schedule will make your miter saw blade last longer. It will also make your cuts more precise. This ensures your projects are always high-quality. Whether you sharpen or replace depends on how the blade currently looks and works.
Common Mistakes to Avoid
When replacing your miter saw blade, certain common blade changing errors can really mess up how well and safely your tool works. These mistakes often include avoiding blade misalignment and not paying attention to putting the blade in right. It’s very important to fix these errors for your saw to work well and to keep you safe.

Getting the blade straight is key for nice and exact cuts. If a blade isn’t straight, you might end up with bad cuts or, even worse, the saw could kick back. Also, it’s crucial to make sure the teeth of the blade are facing the right way for good cutting. If you put it in backward, the saw could act up in unsafe ways.
| Mistake | Consequence | Prevention Tip |
|---|---|---|
| Blade Misalignment | Inaccurate cuts, potential damage to the material | Double-check blade alignment with a square tool before use |
| Incorrect Blade Orientation | Poor performance, increased wear on the saw | Verify the direction of the teeth matches the cutting direction |
| Over-tightening Blade Bolt | Stripped bolt, difficult future changes | Use a torque wrench to ensure proper tension |
To avoid these common blade changing errors, you need to be careful and follow steps when changing your miter saw blade. Always check these things before you start cutting. Doing so will make sure your equipment works its best.
Advanced Tips for Professional Results
To improve your professional miter saw usage, learn more than the basics. Knowing how to choose the right blade selection guide and adjust miter saw settings is key. This will make your cuts neater and more professional.
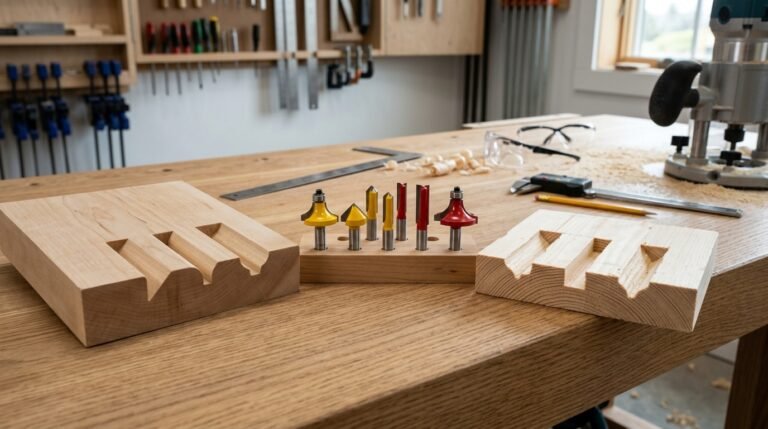
Picking the right blade for each material is critical. Blades for hardwood need different features than those for soft materials or metals. For special jobs like cutting melamine or metal, you need special blades. For help picking the right blade, check this blade selection guide.
- For fine cuts in trim work, choose a blade with more teeth.
- But, for quick, rough cuts in building, a blade with fewer teeth works best.
Adjusting your saw settings is key for tricky cuts. Making bevel cuts or working with tough angles requires proper saw setup. Here are some adjustments you might need:
- Bevel adjustments help the blade cut at different angles for joints.
- Knowing how to tilt and slide helps with wide boards or complex cuts.
It’s smart to align miter saw settings adjustment with your material and cut type. This boosts efficiency and protects your blade and saw.
Using your saw well means making the right cuts carefully. With the right setups and blades for each job, you’ll do better work and your tools will last longer. Exploring a blade selection guide can offer deeper insights and refine your skills for better results in woodworking.
Troubleshooting: Common Blade Change Issues
Working on your miter saw might bring up blade issues. Solving these problems quickly helps your tool work better. We will explore how to fix blade wobble and how to get a stuck blade off.
Addressing blade wobble means checking the saw’s arbor and how the blade is attached. Blade wobble can mess up your work and be unsafe. Make sure the arbor is clean and everything is tight. Sometimes, just reattaching or tightening the blade can stop the wobble.
Resolving blade removal issues needs some care. If the blade won’t come off, try using some penetrating oil to loosen it. Let the oil work for a bit before you try again. Always use the right tools to avoid hurting the blade or saw.
Being patient is important. If it doesn’t work at first, look at your saw’s manual for help. With the correct steps, you can deal with these issues and keep your miter saw cutting cleanly.
Conclusion
Wrapping up, it’s key to note how critical proper blade care is in woodworking. All projects, big or small, benefit from a well-done blade swap. This step can make your miter saw work better and last longer. Plus, it makes your work top-notch.
Think of changing your blade as helping your craft, not as a tiresome task. A sharp blade makes your cuts clean and precise. This is what makes great woodwork stand out. So, we suggest you tackle this task with zest, using our guide. Regular care and switching to a quality blade will improve your cuts and your saw’s life.
In summary, use the steps we’ve shared for effective and safe blade switches. This will keep your miter saw as a key tool in your work. The effort and precision you put into changing the blade will show in your projects. With a well-kept saw, you can create amazing and accurate woodwork. Always remember, great finishes start with the right blade.
FAQ
How often should I change the blade on my miter saw?
How often you change the blade depends on your usage and what you’re cutting. Look for signs like chipping or burn marks as clues to change it.
What happens if I don’t change the blade on my miter saw?
A dull blade can make poor cuts, wear out the saw, and be unsafe. Keeping blades sharp is key for good performance and safety.
How do I know which replacement blade to purchase for my miter saw?
Check your saw’s manual for the right blade size and specs. The tooth count and type matter for what you’re cutting.
Is it safe to change the blade on my miter saw myself?
Yes, if you have the right tools and follow safety steps. Unplug the saw and wear gloves to change the blade safely.
Can I use any blade on my miter saw?
No, you need the right blade for your saw and the material. Always match the blade to your saw’s specs and the material.
What tools will I need to change the blade on my miter saw?
You’ll often need a wrench, safety gloves, and maybe a screwdriver. It depends on how your saw changes blades.
What safety precautions should I take when changing my miter saw blade?
Unplug the saw first and wear gloves. Handle the blade carefully. Make sure the new blade is securely on before use.
How do I align the new blade when installing it on the miter saw?
Put the blade on the arbor right, with teeth going the correct way. Tighten the arbor bolt as the manual says.
How can I ensure my miter saw cuts accurately after changing the blade?
Check your saw’s alignment and adjust if needed. Test the cuts on scrap material to make sure they’re clean and accurate.
What is the best way to maintain my miter saw blade?
Clean the blade regularly with the right products. Check for damage or dullness. Sharpen or replace as needed for quality cuts.
Can I sharpen my miter saw blade instead of replacing it?
Some blades can be sharpened several times. This depends on the blade’s material and condition. Look at the manufacturer’s advice.
What should I do if my miter saw blade is wobbling?
Make sure the arbor and parts like bolts and washers are tight. If it still wobbles, check the manual or get help.
Why is my miter saw blade difficult to remove?
Blades can get stuck from residue or being too tight. Use penetrating oil to help loosen it. Use the right tools if needed.
Can a higher-quality blade make a difference in cutting performance?
Yes, better blades mean cleaner cuts, less waste, and better saw performance. Always consider upgrading your blade.